
Getting Started with SocialBee – A Quick Guide for WPfoss Users
Discover how to get started with SocialBee after purchasing it through WPFoss. Our guide walks you through the setup process, account creation, and how to manage everything from our platform. Save money while enjoying the full SocialBee experience—made easier, faster, and more affordable through our partnership. Let’s get you buzzing!
Getting Started with SocialBee – A Quick Guide for WPfoss Users
Introduction
Welcome to SocialBee! If you purchased SocialBee through [Your Company Name], you're in the right place. This guide will help you set up your account and start managing your social media like a pro. A
Step 1: Log in from Your Client Area
- Log into our system through https://my.wpfoss.com/login.
- Navigate to services and locate Bootstrap socialBee.
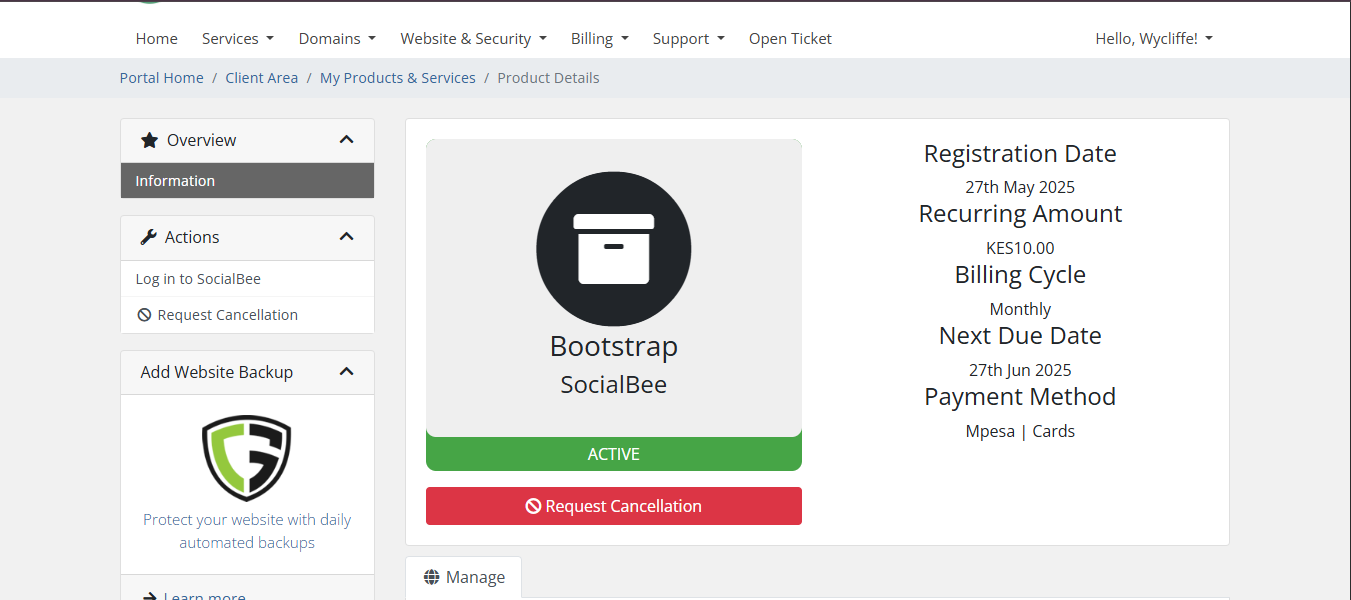
- Right now you should be in this window
- Log in into your socialBee account by clicking the log in to SocialBee button as shown below.
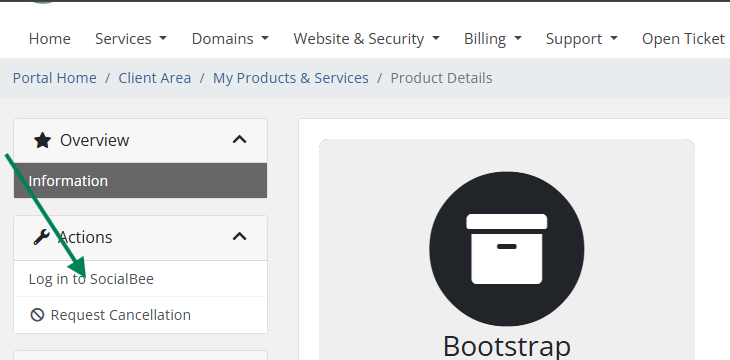
Step 2: Create Your SocialBee Account
- Once you press the log in button, you will be taken to another page where you will create your SocialBee account and you will be ready to get started .
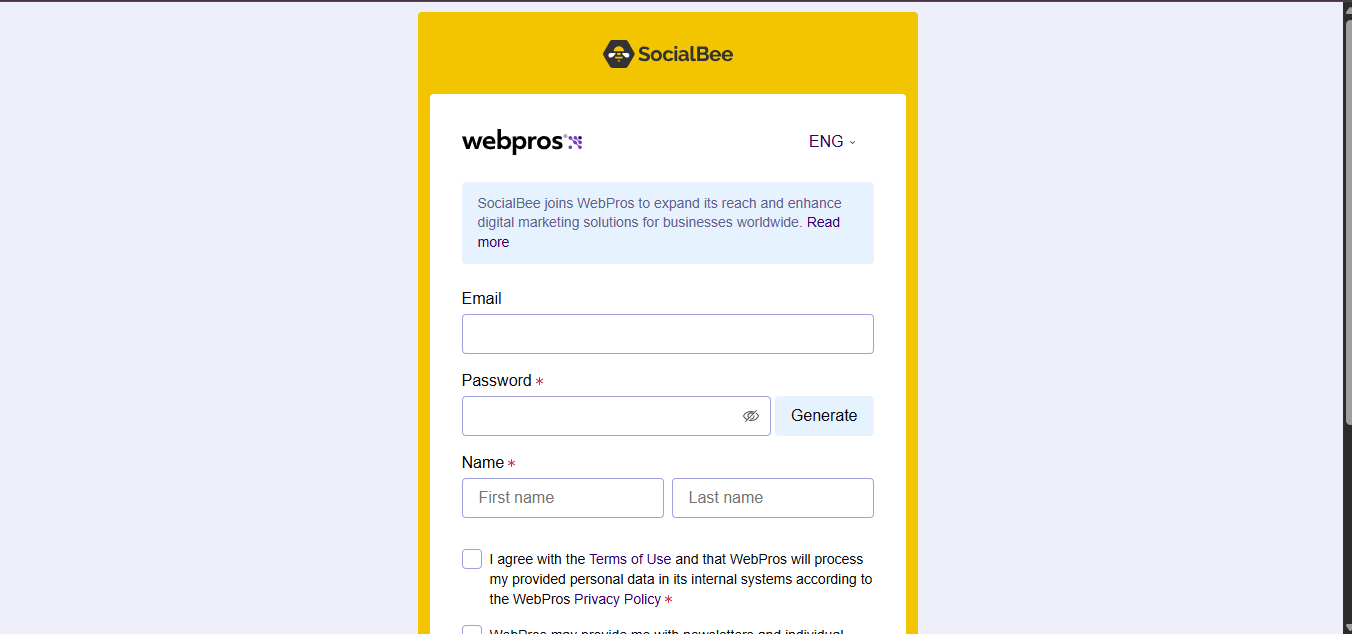
- Enter your details and create your account
Step 3: Connect Your Social Profiles
- Inside your SocialBee dashboard, you will be able to connect your Social media profiles.
- Connect Facebook, Twitter, LinkedIn, or other platforms
- Start creating, posting and scheduling posts from SocialBee
Step 4: Upgrade or Manage Subscription
- For any plan upgrades or changes, return to your Client Area on our website.
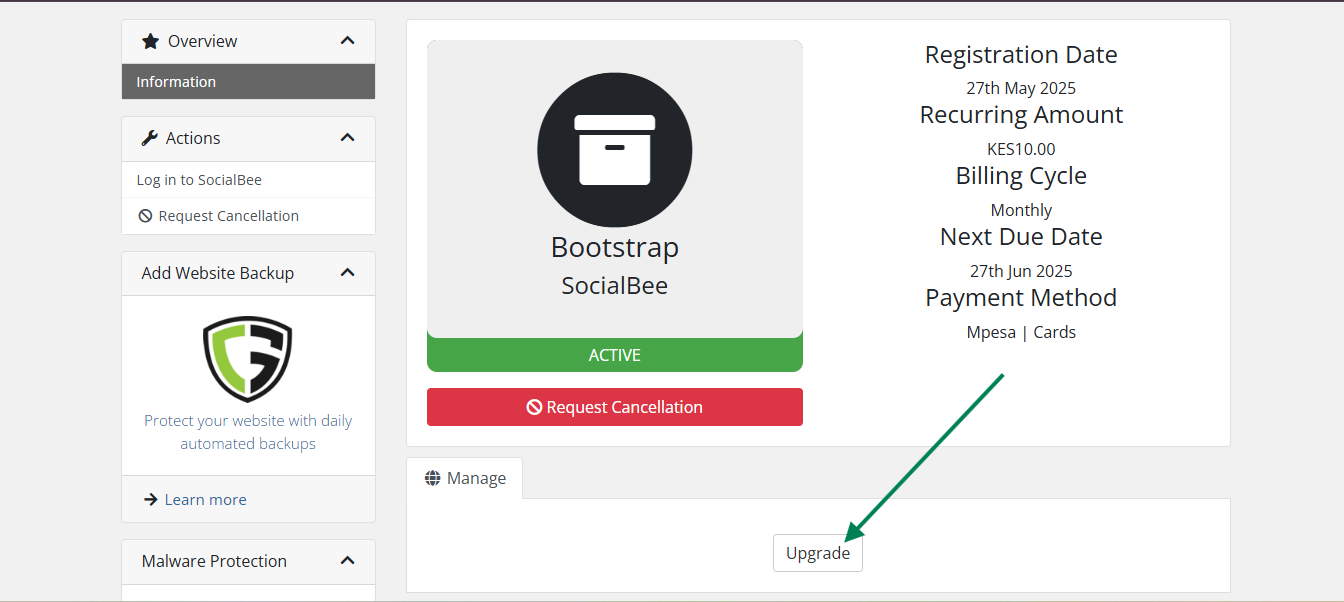
- Once you click upgrade, it will take you to the page where you will see our available plans
- Select the plan you want to upgrade to and enjoy.
Still Need Help?
You can contact our support team anytime via https://my.wpfoss.com/contact.php.
